Hey folks! So it seems that there are quite a few people out there interested in owning a replica of Team Fortress weapons. I received another commission a few weeks ago to have 'The Ambassador' made. The Ambassador, for those who are not familiar with it, is a special weapon used by the Spy in Team Fortress 2. It is visually distinct due to it's hilariously large barrel and exaggerated proportions. It also has an intricate engraving on either side of the barrel reportedly depicting Scout's mother. I knew this would be a fun and relatively simple build because the revolver was clearly modeled after an existing gun. I also happened to have an airsoft version of the revolver and knew that there existed an eight inch barreled version. I started this build with one of those.
First let's take a look at what I am replicating. Below are the left and right orthographic views of the in game model that I pulled out of the game using Steam's SDK model viewer.

 |
| Here is the airsoft revolver as it arrived. For those unfamiliar with airsoft, they are plastic replicas of mostly real guns that fire small plastic BBs at a relatively low amount of power. They are often used in a sport similar to Paintball. |
 |
| Here we can see my first mistake. I erroneously calculated the barrel of The Ambassador to be only 6 inches instead of 8. So, I began by lopping off 2 inches of the barrel. |
 |
| I then set my sights on the grip, which I removed from the gun in order to shape it. I began by removing the last finger groove's peak. |
 |
| I then sanded away the bottom edge before reattaching the grips in order to sand down part of the frame that sat inside of the grips. |
 |
| After sanding down the frame I took a large piece of Apoxie Sculpt and began to shape the distinct curved grip. |
 |
| Here is the back of the grip. You can see there are some folds that will need to be Bondoed and smoothed at a later point. |
 |
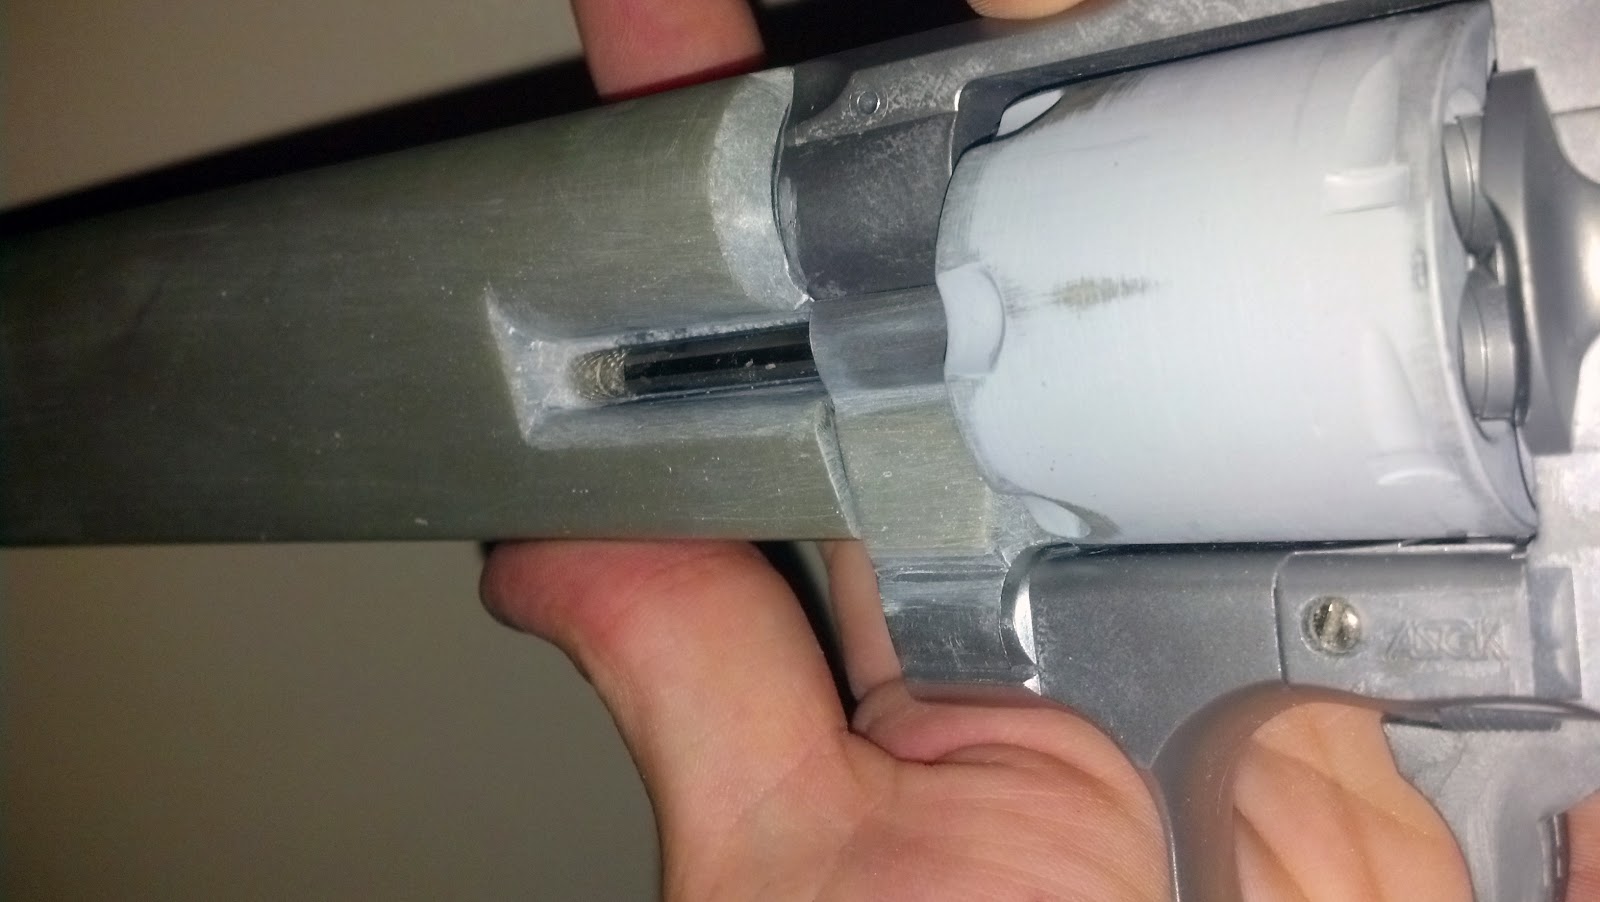
| I then needed to fill the hole in the hollow barrel I had created as a result of sawing it off. I used a straw to keep the barrel clear (at this point in time I had wished to keep it functional) while I used Apoxie Sculpt to fill the hole. |
 |
| In order to shorten the grooves in the cylinder of The Ambassador I filled in the existing grooved with a small bit of Apoxie Sculpt. |
 |
| I then jerry-rigged a small drill powered lathe to sand them down. |
 |
| I would later go in by hand and manually shape them to my liking. |
 |
| After the Apoxie Sculpt set I applied Bondo to help fill in the texture of the original grip and sanded it down to the shape I sought. |
 |
| Next I applied the single largest amount of Apoxie Sculpt I have used thus far to the barrel. I laid out a flat layer of the material and wrapped it around the barrel. Unfortunately I did not snap a picture of the raw Apoxie Sculpt application, however here it is after a bit of sanding to define the shape better. |
 |
| It is at this point that I begin to notice the barrel may be a bit short. |
 |
| Here it is after a bit more refining. |
 |
| After consulting the Team Fortress 2 pros on the TF2 section of Reddit I decided I would need to take action to re-lengthen the barrel to 8 inches. Fortunately this turned out to be a blessing in disguise because the technique I used to solve the issue increased the overall aesthetic accuracy of the prop by widening the diameter of the barrel. The barrel of The Ambassador is unrealistically wide. |
 |
| After applying more Apoxie Sculpt you can see the barrel has once again been shaped and that I have filed out a groove to allow the cylinder ejection rod to fit into place. |
 |
| Here you can really see the effect of the exaggerated barrel diameter. |
 |
| And here a nice overall progress shot that also shows the beginning of the shaping of the ejection rod groove on the barrel. |
 |
| Here is a further refined ejection rod groove. I am attempting to keep the curve of the barrel while it receeds into the overall piece to allow the ejection rod to fit into place. I then primed the cylinder in order to check for and fix imperfections. I also added a spot of Apoxie Sculpt to re-shape the cylinder swing arm to more accurately resemble The Ambassador. |
 |
| More Apoxie Sulpt was added to the other side to flatten the frame as it is on The Ambassador. |
 |
| Here is a progress shot of the bevel that tapers the barrel of the gun toward the frame. This was a really tough part and I am worried about how it will look on the final gun. |
 |
| I took this shot in black and white in order to better show the form without being distracted by the pink color of the Bondo. |
 |
| in order to get an idea of the size of the space I would be engraving Scount's mom onto I used layers of masking tape to create a silhouette of the shape the engraving sits in. I then peeled the shape off, attached it to a sheet of paper and scanned it. I then created a vector outline of the space fit a vectorized tracing of the original engraving that was taken from the game's texture file. |
 |
| I ordered a few sheets of some special inkjet printer paper that would allow me to make rub-on decals. I printed out a set of them in order to provide a guide in which to engrave the drawing on the barrel. These devals ended up being tricky to use and took quite a lot of time to get right. I ended up needing to order a second set after screwing up all of the first set of sheets. |
 |
| To get an idea of what I was in for, I used a piece of scrap Apoxie Sculpt to practice engraving. I felt like I had a decent enough grasp on the concept to move on after this, however that would later prove to be a false assumption. |
 |
| Here you can see the result of my initial first pass of engraving using the Dremel tool. I would later widen the grooves with the scribe you see pictured next to the barrel. You can see the longer curves nearer the bottom of the photo are horribly misshapen. |
 |
| I rubbed ink into the engraving in order to snap a mock up picture to post on Reddit for feedback. |
 |
| If you look closely at the top right section of this photo you may see small pink veins. This is where I used Bondo to fill in errors and attempt the engraving again. I did this four time before I settled for the engraving I had in fear that too many more Bondo jobs would cause further issues with the engraving process. |
 |
| Here is a better depiction of the Bondo fill in as I prepare to attempt the engraving again. |
 |
| Wrought with frustration I decided to move on to tackle the trigger guard while I awaited the arrival of the second set of decals. |
 |
| Here you can see a quick assembly shot. I would go on to revisit the engraving once more after this photo. |
 |
| In order to provide structural support for the Apoxie Sculpt when making the trigger guard I wrapped several strands of wire in tape. |
 |
| I then bent it into shape in order to estimate the final length of the piece of tape covered wire. |
 |
| Here you can see the final engraving for this side of the barrel. I was able to fix the top right corner just enough for me to be able to sleep at night. But only BARELY! I still have one or two small over-cuts that I would like to fill in with Bondo. |
 |
So after a few applications of Bondo and Apoxie Sculpt I managed to work out a pretty nice representation of the trigger guard on the gun in-game.
 |
Next I wanted to tackle the sight rail, so I used a piece of scrap acrylic sheeting. I rigged up the above device to route out a groove on the top of the rail. Afterward I decided this piece would need to be cast separately from the rest of the gun.
|
|


I want one. Now. How much?
ReplyDelete10/10 would buy.
ReplyDeleteFantastic work, like how you jury rigged the dremel. Great idea
ReplyDeletehow much?
ReplyDeleteHow much to buy it?
ReplyDeleteThis comment has been removed by the author.
ReplyDeleteAmazing!
ReplyDeletedoes to prop still fire bb or is is it just for cosplay now
ReplyDeleteCan you please make the medigun from team fortress 2?
ReplyDeleteTeam Fortress 2 benzeri oyunlar için tıklayın: : team fortress 2 benzeri oyunlar
ReplyDeleteTeam Fortress 2 benzeri oyunlarmı arıyorsunuz? buraya tıklayın :)
ReplyDeleteamogus
ReplyDelete